
The OS X Finder is how most of us interact with the filesystem on our Macs, and while the default settings are user friendly, there are some additional options that can be configured to make the Finder a much better experience. From the simplest things like showing the extension of documents, to revealing the status bar and having invisible items become shown again, you’re sure to get more out of the Mac Finder by making a few of these adjustments.
1: Always Show File Extensions
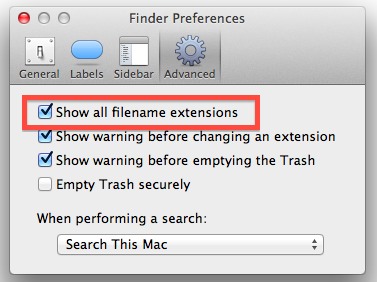
Tired of not knowing what’s a .jpg, .png, .gif, or whatever else just by looking at the extension? Show those file extensions and you can easily identify file formats just by looking at the name:
Go to the “Finder” menu, then choose “Preferences”
Back in Finder Preferences, go to the “Advanced” tab and check the box next to “Show all filename extensions”
2: Forget All My Files, Open New Windows to Home Directory
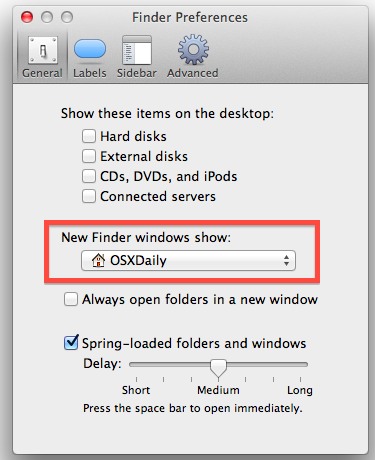
All My Files can be nice, but if you actually sort files by the folders yourself it’s usually just an extra step before you get to your home folder, let’s change that back:
Open Finder Preferences by going to the “Finder” menu, then choosing “Preferences”
Under the “General” tab, pull down the menu next to “New Finder windows show:” and select your home directory
3: Show the Status Bar
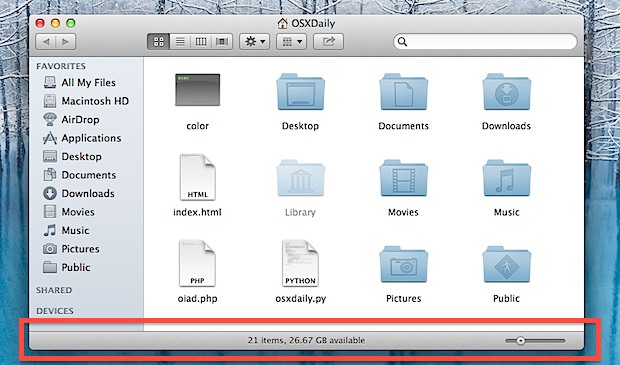
The Finder window status bar displays important information ranging from how much space is available on a Mac to how many files are in the current directory. This should be shown all the time, and it’s easy to do:
From any Finder window, pull down the “View” menu and select “Show Status Bar”
4: Show the Path Bar
Ever wanted an easy way to see exactly where you are in the file system? Show the Path Bar, and you can not only see your full path but instantly jump forward and back by selecting the appropriate parent and child directories. This may be best for advanced users who are often digging around deep in the file system, but it’s so useful it must be included:
From any Finder window, go to the “View” menu and choose “Show Path Bar”
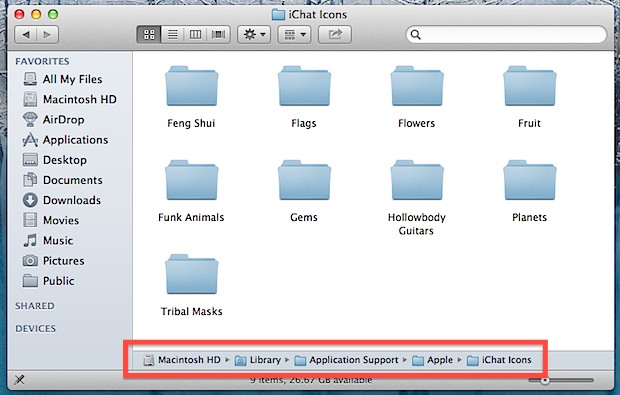
Remember, the Path bar is interactive! You can click on it to jump to locations, and even drag and drop things into it.
5: Show Your Home Directory in the Sidebar
With how often things are stored in the Home directory, it should probably be visible in the Finder window sidebar all the time. That’s an easy option to set:
Open Finder Preferences from the “Finder” menu, choose the “Sidebar” tab
Check the box next to your username and the home icon
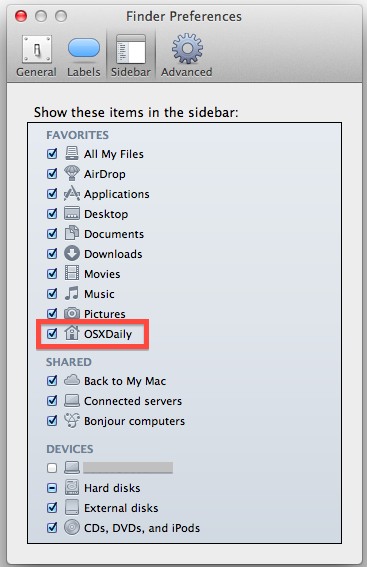
Now use drag & drop to arrange your Home folder in the sidebar to somewhere that makes sense, somewhere near the top works for me.
6: Customize the Tool Bar
The Finder window toolbar can be modified to add or remove frequently used Finder features. The back/forward buttons, arrange, and sharing features are great, but don’t forget to adjust this yourself if you want some more quick options:
Go to the “View” menu and select “Customize Toolbar…”
Drag commonly used actions into the toolbar (Path and Connect to Server are great additions)

7: Always Show the Users Library Folder
The Library folder is where preference files, caches, and user data is stored, but it’s now hidden by default. With a quick visit to the command line you can have the ~/Library/ directory always be shown again in OS X.
Open Terminal and type the following command:
chflags nohidden ~/Library/
Exit Terminal

8: Always Show Hidden & Invisible Files
Perhaps best reserved for advanced users and web developers, setting hidden files to always show in the OS X Finder is a huge time saver for anyone who frequently needs to access files that start with a . or are otherwise hidden.
Open Terminal and enter the following defaults string:
defaults write com.apple.finder AppleShowAllFiles -bool YES && killall Finder
Exit Terminal
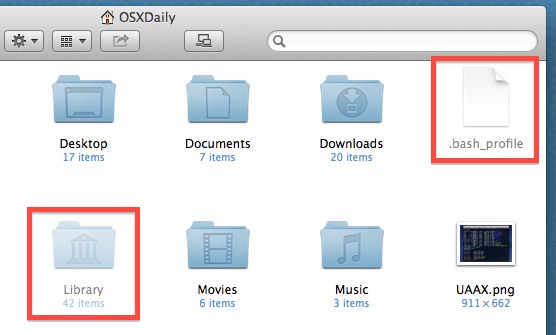
Yes, this also reveals the Library if you haven’t set it to be visible with the prior command. Note that hidden files icons are slightly opaque compared to a normally visible file.
9: Show Item Info of Files & Folders
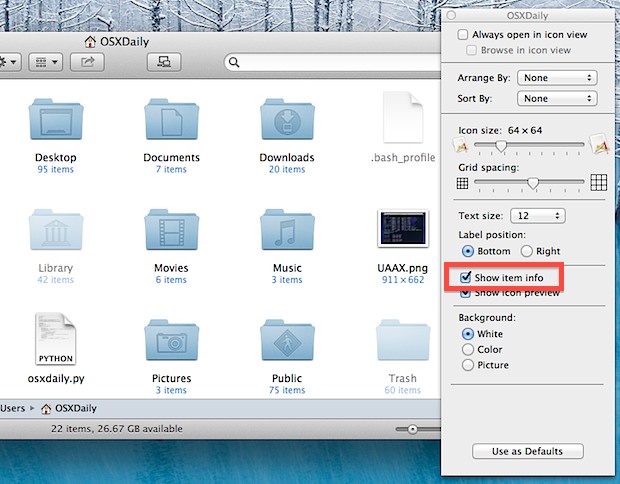
Having Finder tell you item info is incredibly useful, you’ll suddenly see how many files are in directories and image dimensions will become visible right from the Finder. This is a must-have option for anyone who works with graphics or images in particular.
Right-click on any Finder window and go to “View Options”
Check the box next to “Show Item Info”
Optionally (but recommended) select “Use as Defaults” to apply the item info change to all Finder windows
Anything Else?
Did we miss something? What are ways can the Finder be modified to be even better and more useful? Let us know in the comments. And if you’re looking for some more advanced options to improve Mac OS X, check out this list of the best defaults write commands too.