 by
by Making a movie is one thing, adding flashy graphics is another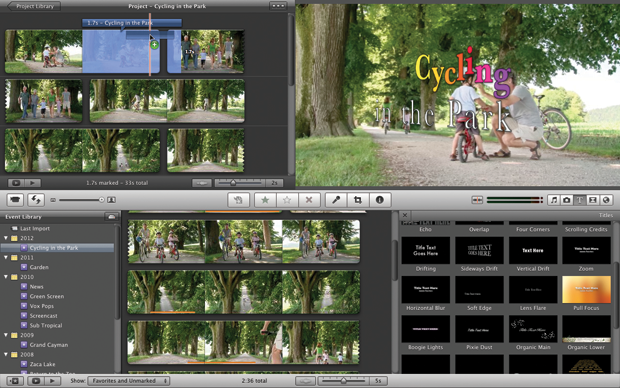
iMovie makes it really easy to create great-looking home-movies in minutes, and that includes giving them a more polished and professional edge. There are several ways to do this, including with titles and credits, and so, it shouldn’t come as any surprise, that iMovie has many titling options under its belt.
Although you can add in your titles at any time during the editing process (and those titles can be moved around and altered at any point), it’s always wise to add them to your project once you’ve ‘locked’ the edit. It’s usually the last thing you do before exporting your work.
iMovie’s selection of 32 titles are just a mere click away and range from opening credits, to closing titles, to lower thirds – the name given to text that appears, usually to present a new person, or a new location. They’re called ‘lower thirds’ because they’re displayed horizontally on the lower third of the video.
These titling options don’t first seem to offer much in the way of customization. But while you can’t change the way text appears and leaves the screen, you can alter font size, type and color. Combining these adjustments makes for a more unique look.
What You’ll Need:
>> iMovie ’11 version 9.0.4 or later, a project in progress, a basic understanding of the interface
1. Start your Project

Open a project. If you start one from scratch make sure you add a few clips into it first: you can’t add titles to a project that doesn’t contain any clips. To reveal the Titles, click on the “T” button in the toolbar, go to Window > Titles or use the Command-3 keyboard shortcut.
2. Choose a title

You have 32 titles to choose from. The thumbnails don’t give much away since the titles are animated and all you see is a static image. However, when you hover your cursor over one of them the thumbnail animates to give you an idea of what to expect.
3. Click and drag

Drag the title onto a clip. Notice that if you hover over the left side of the clip, the first third gets highlighted. Hover over the middle to highlight all of it, and hover over the right to select the last third. This helps you determine how long and where the title will be added.
4. Reposition the title

Your title appears as a blue bar on top of your clip, but it’s not anchored there. Once it’s in your project, you can drag it anywhere, even across multiple clips and transitions. You can alter its duration by dragging either of its edges (you don’t get a resize cursor, but it still works).
5. Edit the text

With your title selected (it has a yellow highlight around it), its text editing capabilities are revealed in the main preview. Type over the generic text… and that’s about the limit of your editing at first glance. You can click on the play button, top-right of that section to preview it.
6. Change the font

Although you can’t alter your chosen title’s animation, you have full control over the text: click on Show Fonts to open up Mac OS X’s traditional Font palette. With it, you can choose any font currently installed on your Mac — and any available style, alignment, color, etc.
7. Customize the type

You’ll notice that you can’t reposition the text box on the screen: it has to remain where it is. However, if you alter your text’s Baseline, you can move it up or down. You can also apply changes to a single word or letter, helping you create truly unique titles in very little time.
8. Change titles

If you want to use a different title, you can’t drag another from the Transitions section. Instead, double-click on your title to reveal the Inspector window. Click your title’s name to flip the window and reveal all other titles. Most preserve alterations you’ve already made.