Protag Duet Bluetooth tracking tag

Losing important items is always a concern, especially when it comes to smartphones. Whether phones are misplaced in the course of a day or left behind when moving about, it is something that happens frequently. But what if there was a device that coul…

EverWeb Review

Apple’s iWeb has long been a godsend for those wanting to design their own website but who didn’t have the coding skills to do so from scratch. So, when Apple announced that it would no longer be supporting or developing iWeb in 2012, the quest for a suitable replacement began in earnest. EverWeb, from RAGE Software, aims to be just that — and, for the most part, it’s right on target.

EverWeb’s interface, while not a carbon copy, will be immediately familiar to anyone who’s used iWeb. Additionally, most iWeb features have an equivalent in EverWeb, while some extras, such as the functionality of the iWeb SEO Tool, have been integrated into this application.

What this means is that websites can be built much in the same way that you make a graphics-rich document in Word or Pages. There’s no coding involved — simply a WYSIWYG interface and various elements from shapes and social widgets to images and video that you can drag-and-drop into place. The results approach those of what’s possible with traditional site design and coding, while more experienced users can get under the hood to work in HTML5 and CSS3 for further customization.

As already mentioned, EverWeb boasts some functionality not present in the last available version of iWeb. This includes master pages, which allow elements to be easily repeated across multiple sections of a site, and drop-down navigation menus. EverWeb also builds on the e-commerce functionality of iWeb by enabling users to implement a full shopping-cart-based sales system, in addition to PayPal integration.

The included site templates are numerous, but oddly specific (one is for a chiropractic website). Each features a mobile-optimized version, and additional templates are available. EverWeb also includes a gallery of embeddable widgets, from RSS feeds and Google maps to feedback forms and image galleries. Additional widgets are also available from the EverWeb community.

Version 1.3 of EverWeb (reviewed) allows for the publishing of your site directly to an FTP server via an intuitive interface. Those who opt for the $99.95-per-year one-click publishing version of the application that includes 2GB of web hosting can, as the name suggests, publish and configure their site right from EverWeb.

If you’re someone who’s come to depend on iWeb and would like a supported version that will continue to evolve into the foreseeable future, or are just looking to build a website without getting your hands dirty with code, EverWeb is a great option. It’s still missing some things, like built-in blogging functionality, but unlike with the original iWeb, there’s at least some hope that it may one day be included.

The bottom line. If you’ve been seeking an iWeb replacement or are simply new to the whole website design thing, EverWeb is both a worthy successor and a good first step toward building your own web presence.

Review Synopsis

Product: 

EverWeb 1.3

Company: 

RAGE Software

Contact: 

Price: 

$79.95

Requirements: 

OS X 6.0 or later

Positives: 

Replicates iWeb functionality and interface while adding some features. Easy to understand and use even for web-design novices. Generating mobile sites, adding e-commerce, and implementing SEO are very simple.

Negatives: 

No native blogging support.

Score: 
4.5 Excellent

System Lens review: View app CPU usage with a click

Whenever the fans in my MacBook Pro suddenly rev up, I use the built-in Activity Monitor app (Applications > Utilities) to see what’s going on. But I’ve often wished for a quicker and easier way to check my Mac’s activity than having to open Activity Monitor.

The free System Lens (Mac App Store link) offers a compromise: It resides in the menu bar, and when you click its icon, you see a snapshot of which apps are actively using your computer’s resources.

system lens 04
System Lens provides one-click access to a list of apps using processor resources.

System Lens doesn’t offer all the features or the flexibility of Activity Monitor. For example, while Activity Monitor provides hard numbers about how much processing power an app is using (such as CPU percentage or the number of threads), System Lens uses simple labels: Low, Medium, and High. For people who want the details, System Lens won’t replace Activity Monitor completely.

To read this article in full or to leave a comment, please click here

QuickBooks app for Mac review: Intuit’s free app makes QuickBooks Online more friendly

Adobe Sketch and Line master drafting and sketching on the iPad

Adobe was a bit busy on Wednesday, releasing new versions of its Creative Cloud suite, new hardware, and three new iOS apps—two of them sketching and drawing-related. Adobe Sketch and Line may have been conceived as vehicles for the company’s Ink and Slide stylus and ruler, but the apps easily stand on their own as fantastic applications for drawing and drafting enthusiasts. Both apps are compatible with the fourth-generation iPad or later and first-generation iPad mini or later.

To read this article in full or to leave a comment, please click here

Adobe brings new life to the iPad stylus market with Ink and Slide

For a few years now, Adobe’s been teasing its followers about Project Mighty, its iPad stylus and ruler prototypes. The day has finally come: Those prototypes have graduated to full-fledged products in the form of Adobe Ink and Slide, available in the United States for $200. The accessories are also paired with two new iPad apps from the company: Adobe Line and Sketch.

Down to details: stylus and ruler, together

It’s hard to talk about Adobe’s latest accessory offering without first acknowledging its price: At over $100, The Ink and Slide has the highest price tag we’ve seen in the iOS stylus market. To be fair, that’s partly a result of Adobe packaging the Ink stylus and Slide ruler together—you can’t buy them separately. Which is a shame, because while Ink stylus is a pretty good iOS pen, it’s not the best in its class; the Slide ruler, however, is the kind of unique accessory I suspect many people will want.

To read this article in full or to leave a comment, please click here

LaCie Rugged Thunderbolt review: Hard drive is tough like a brick

PrivacyScan 1.5 Review

Privacy is one of the most important words in tech today. It seems like we hear about new threats to our identities almost daily, whether someone’s hacking into our credit card company’s files or the government is peeking into our emails and messages. 

But it’s not just our personal information that’s vulnerable. The files on our Macs that we never see — cookies, caches, download histories, recent items, even icons — can be used to track our digital fingerprints and compromise our privacy without us ever realizing it. Browsers and certain apps are constantly keeping track of what we’re doing and storing it for easy access later. If you don’t want all of this data to come back and haunt you, you should get rid of it.

Of course, there’s a fairly easy way to do it built right into OS X. At the end of each day, you can dutifully head to the menu and clear out all of the offending files on an app-by-app basis until everything is wiped clean. But it’s a tedious process — and even if you can remember to do it on a regular basis, there’s no way to know if you’ve gotten them all.

PrivacyScan simplifies the whole process by taking the guesswork out of it. Right from the start, the app does most of the work for you, scanning your Mac to find any supported apps. The main window lists every app available for cleaning — ours included Safari, Chrome, Preview, QuickTime, Flash, and the Finder — and there are individual settings within that give you full control over which files to delete. Pressing the run button unleashes PrivacyScan on your Mac’s most vulnerable folders, and within seconds it returns a batch of files to be scrubbed. You need only press the trash button to instantly delete them — or, if you’re particularly paranoid, eradicate them with Department of Defense–level shredding.

It’s all very fast and simple, and PrivacyScan certainly made us feel less exposed when it had finished. It might not stop any malicious attacks or viruses, but there’s something to be said for covering our tracks, especially for those who travel a lot with their MacBook Pros. A spot check of the folders confirmed that files were indeed jettisoned, but we experienced occasional issues with its handling of the Google Chrome browser, which triggered a few crashes and hang-ups. 

We’re not sure how regularly we would run PrivacyScan, but the ability to set a schedule and forget about it might help, as would an option to securely delete the files in our trash.

The bottom line. Even if you haven’t fashioned a tinfoil hat, PrivacyScan’s system of deletion will make you sleep just a little better at night.

Review Synopsis

Product: 

PrivacyScan 1.5

Company: 

SecureMac

Price: 

$14.99

Requirements: 

64-bit Mac running OS X 10.6.6 or later

Positives: 

Simple interface. Fast, easy cleaning of files. Excellent shredding for secure deletion.

Negatives: 

Some issues related to its handling the Google Chrome browser. No way to automate cleaning schedule.

Score: 
4 Great

How to Go Further with Dropbox

The Dropbox service lets you store and access your files remotely, but that’s just the beginning. Once your files are uploaded, the service lets you do a whole lot more, particularly when it comes to sharing and collaboration.

One of its most useful features is sharing, and you can easily send links to files, folders, and albums to others to allow access, complete with access controls or permissions. You can also create shared folders others can join when invited — the folder appears inside their Dropbox, and content they place into it is automatically synced. You can see how handy this would be for working on projects with people over the Internet: no need to email files, just keep a synced folder of files. 

When you collaborate, several people may open and work on a single document, so it’s important to know if and when changes have been made. Luckily, Dropbox also supports versioning. As a new version of a file is saved and synced, it keeps both the old and new versions, and you can access or restore any version at any time. And if someone accidentally deletes a file, that’s no problem either. Synced items that you remove from your local Dropbox folder or manually delete from your main file list on the Dropbox website are not fully deleted from Dropbox’s servers; they just disappear from your listing, and are removed from your computer’s storage. They can be restored, unless you choose to permanently delete them.


1. Share a File

The main file list in your Dropbox web account provides a way to send a link to any file easily. Click once on a file to highlight it, and a link icon appears. There’s also a link in the toolbar at the top of the file list that performs the same action. Click Share Link and your file is opened in web view.


2. Email the Link

Click Share at the top of the screen and a window opens where you can enter the email addresses of recipients, as well as add an optional message. Facebook and Twitter buttons let you post the link to your social media account. Click Send, or click Get Link to copy the link to the clipboard.


3. Create a New Folder

To share multiple files, group them into a folder first. Click on the New Folder button in the toolbar at the top and name your folder. Now select the items in the list that you want — to select multiple items, click the first, then Command-click any others you want — and drag them into the new folder.


4. Share the Folder

Select your new folder in the main file list and right-click on it. This is yet another way to share an item — by using the contextual menu. Repeat the previous steps to enter the recipients’ email addresses and send a link to that folder. If you edit the contents of the folder, the link still works.


5. Collaborate on a Folder

To create a collaborative folder, right-click on it in the list and select Invite to Folder. Again, add a recipient’s details plus an optional message. You can also allow the recipient to invite others — or not, if you want to keep it private. The folder appears in their Dropbox account.


6. View Versions of a File

If you open and modify a file in your Dropbox folder, the updated version is synced to the cloud. If you right-click the file on the Dropbox website and select Previous Versions, you see all available versions from newest to oldest, as well as who uploaded it and when it was synced.


7. Restore a Previous Version

From the versions list, you can select any previous version and restore it by clicking Restore. Now the version shown in your main file list is the one you selected. If you look at the previous Versions list again, you see nothing has been overwritten; everything remains available.


8. Restore a Deleted File

If you’ve deleted a synced file from your Mac or from Dropbox, it isn’t actually gone. Click the trash-can icon at the top of the main file list to show deleted files, then right-click on a deleted file and choose Restore to undelete it, or you can choose Permanently Delete to get rid of it for good.

Review Roundup: 3 wireless microphones for speech recognition

When I looked at microphones for speech recognition a few years ago, Bluetooth microphones didn’t offer good enough voice quality for use with Dragon Dictate, the Mac benchmark for dictation software. Since then, advances have been made in Bluetooth technology, so it’s a good time to look specifically at wireless microphones that offer good enough sound and noise cancellation to use with Dragon Dictate. I tried two Bluetooth microphones and one DECT model. Note that I only discuss these mics for use with speech recognition, not other features such as using them with an iPhone, landline or Skype.

To read this article in full or to leave a comment, please click here

Who needs iOS 8? Four time-lapse apps you can use today

Time-lapse mode is just one of the cool new features coming when iOS 8 hits devices everywhere this fall, but you don’t have to wait until September to play with it on your iPhone or iPad. There are plenty of third-party apps that offer time-lapse photography; here are four of my favorites, each offering a slightly different experience depending on what you need.

The most like iOS 8: Time Lapse Camera (Free/$1)

timelapse timelapse free gif

If you want something similar to iOS 8’s automatic timelapse mode, it’s hard to go wrong with Time Lapse Camera (Free with iAds, no-ad version for $1). A bare-bones but functional app, Time Lapse Camera offers you just two options: the interval you want images taken at (from every .4 seconds up to every 30 seconds), and when to press the start button.

To read this article in full or to leave a comment, please click here

Gear We Love: Toddy Gear makes screen-cleaning cloths that work

There’s a lot of gear out there for your Apple devices, but how do you know which are worth your time and what’s not worth your money? In our Gear We Love column, Macworld’s editors tell you about the products we’re personally using—and loving.

I never thought I’d be writing an article about a screen-cleaning cloth. The vendors of these products regularly send Macworld and other publications samples, and for the most part, one is the same as the next is the same as the next. We of course give each a try, but they almost always end up in a box somewhere—it’s tough to justify writing about cloths, no matter how high-tech their vendors claim them to be.

To read this article in full or to leave a comment, please click here

Easy Mac Hacks: Speed up Mission Control

Every Monday we show you how to do something quick and cool using built-in OS X utilities such as Terminal, Apple’s command line application. These easy hacks can make life better and simpler, and don’t require any knowledge of coding — all you need is a keyboard to type ’em out!

Mission Control was released with OS X Lion to provide an easy-to-use switching manager for using multiple apps and desktops under a single user interface. As with other areas of OS X, animations in Mission Control are prevalent, but they do take time, and when switching your apps you want the fastest possible experience. Fortunately, with a little Terminal trick, you can reduce the time spent on these animations. Continue reading and we’ll show you how it’s done.

To speed up the animations on Mission Control, open the Terminal (located in /Applications/Utilities), and type in the following command, followed by the enter key:

defaults write com.apple.dock expose-animation-duration -float 0.15

To make the changes take effect, you can either log out and back in, or type the following command into Terminal to restart the Dock:

killall Dock

After restarting the Dock, the new and speedier animations will be available when activating both Exposé and Mission Control.

If you wish to restore the Mission Control animations to their default speed, then open the Terminal and type the following command followed by the enter key:

defaults delete com.apple.dock expose-animation-duration

Again, you can make the changes take effect by either logging out and back in, or by typing the following command into Terminal:

killall Dock

Cory Bohon is a freelance technology writer, indie Mac and iOS developer, and amateur photographer. Follow this article’s author on Twitter.

Turn your G4-era Mac into a next-gen Amiga

Long ago, Mac fans and Commodore Amiga fans fought like mortal blood enemies. But we now live in a far more civilized age—one where Macs and Amigas can walk together, hand-in-hand, along the sandy shores of computerburg.

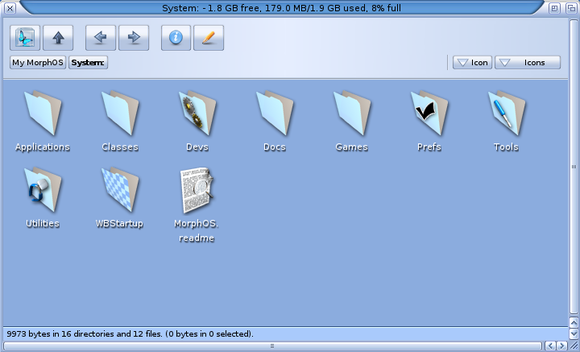
For that we can thank MorphOS 3.5, a free-to-try Amigalike operating system developed by Amiga and PowerPC aficionados. With a simple download and a CD-burn, you can turn an aging G4-era Macintosh into a modern day Amiga-compatible machine.

morphos system folder

MorphOS system folder.

To read this article in full or to leave a comment, please click here

Space Hulk review: Violent, ultra-tense sci-fi board game for iPad

Nerds of a certain age are sure to have fond memories of Space Hulk), one of the great board games of the late 1980s. Set in the same grim, futuristic universe as Games Workshop’s Warhammer 40,000 tabletop wargame, Space Hulk for iPad is an altogether tighter experience that Warhammer’s grand, sprawling battles—Space Hulk is condensed into a claustrophobic system of ducts and corridors. It’s a game of rare simplicity, elegance, and tension.

space hulk ipad game review 1000b

Space Hulk was originally for two players, although in the iPad version you can play against the computer. (There’s also local and online multiplayer, although the latter can involve a certain amount of tedious waiting around.) One player controls the humans: a handful of space marines in massive suits of armor, clanking around the derelict space ship of the game’s title and trying to accomplish their quest objectives. The other player gets an unlimited number of vicious, six-limbed aliens called Genestealers because of their parasitical lifecycle (as you may come to observe, Space Hulk owes something of a cultural debt to the Alien films). The Genestealers do their best to overwhelm the humans and claw them to pieces.

To read this article in full or to leave a comment, please click here

Do you have bad RAM? How to find it and how to fix it

The RAM in your Mac is in essence the active workspace of your computer, in which your programs run and your content is created. Because of this, healthy RAM is vital for properly running any software on your Mac, be it the system software that comes with OS X or third-party programs.

Unfortunately, if the RAM in your Mac is faulty, those faults can sometimes persist undetected for a while, only to crop up unexpectedly and result in a crash, hang, or other unwanted behavior. Therefore, it is good to not only be able to identify faulty RAM, but also be able to properly test for it and then be prepared to fix the problem, if it arises.

Faulty RAM symptoms

If your system’s RAM is not working correctly, then you will likely see one of several symptoms when using your Mac:

To read this article in full or to leave a comment, please click here